Pages

Friday, September 27, 2019

decomposing and recycling

DECOMPOSING AND RECYCLING

Aim: To learn about the rate that different materials decompose. 
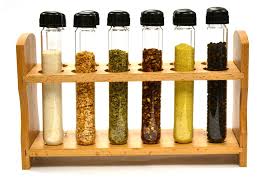

Image result for test tube rack


Hypothesis: I think that......this is a good thing that this experiment is what we are learning today.

Materials:

  1.   paper
  2.   banana
  3.   bread
  4.   Styrofoam 
  5.   4 Test Tube
  6.   water
  7.     Test Tube rack
Steps:
  1.   first you need to go to a group
  2.   then you need to get the Test Tube and the tube rack 
  3. after you got the test tube you need you have to get the Styrofoam, banana, bread and the paper that you going to put there 
  4.   and after you got all the things that you need you should put the Styrofoam, banana, paper and the bread in different test tube
  5.   then you need the paper to right your groups names on it.
  6.   
  7.  
Image:

Findings:


TODAY
Colour
Change
Observations
Banana
yellow/brownnonethe banana just sitting in the same spot
Paper
whitenonethe paper just sitting in the same spot
Styrofoam cup
white nonethe Styrofoam just sitting in the same spot
Bread
brownnonethe bread just sitting in the same spot

  •   
  •   
  •   


3 weeks
Colour
Change
Observations
Banana
green, brown, whitethe change of the banana is that the banana has a moss in it and it start to look all green because of the moss.the banana has a moss in the side of it and the moss starts to take all of the banana to a moss
Paper
brownnoneit's the same as ever
Styrofoam cup
whitenonesame as ever
Bread
white nonesame as every

  •   
  •   
  •   


5 weeks
Colour
Change
Observations
Banana


Paper


Styrofoam cup


Bread


  •    
  •    
  •     
  •    


Images:

Oct 15, 2019 11:45:24 AM.jpg


Conclusion:


Thursday, September 26, 2019

Tuesday, September 24, 2019

climate change investigation


My Investigation on climate change


    ACIDIFICATION

    DEFINITION:

    the definition of it was the action or process of making or becoming acidic.3
    What is happening to the oceans?
    Ocean acidification refers to decreasing levels of pH in the ocean, which makes the sea more acidic. It is the long-term change in seawater chemistry due to the absorption of carbon dioxide from the atmosphere. Roughly 30 percent of human-made CO2 is absorbed by the oceans.
    What does this do to shellfish?

    For oysters, scallops and other shellfish, lower pH means less carbonate, which they rely on to build their essential shells. As acidity increases, shells become thinner, growth slows down and death rates rise. ... They're using a form of calcium carbonate to build their shell that dissolves really easily.


    HOW DOES CLIMATE CHANGE CONTRIBUTE TO THE ACIDIFICATION OF OUR OCEANS?


    2 Images:


    Image result for HOW DOES CLIMATE CHANGE CONTRIBUTE TO THE ACIDIFICATION OF OUR OCEANS?


    DEFINITION:the definition is that the action of clearing a wide area of trees.
    What are trees used for?
    trees can be use'd for different furniture's like chair, table's, pencils, paper, etc.


    HOW DOES DEFORESTATION AFFECT THE CLIMATE?


    2 Images;Image result for HOW DOES DEFORESTATION AFFECT THE CLIMATE?Related image


    ICE CAP MELT

    DEFINITION:

    the definition of it is that  an ice bag shaped to the head and cover of perennial ice and snow specifically : a glacier forming on an extensive area of relatively level land and flowing outward from its centre.
    If all the ice melted what would happen? 
    the air well so cold and when it melted the cold air will spread all over the place

    HOW DOES ICE CAP MELT AFFECT CLIMATE CHANGE?


    2 Images;


    WATER VAPOUR

    DEFINITION:

    the definition of this water vapour is that Water vapourwater vapour or aqueous vapour is the gaseous phase of water. It is one state of water within the hydrosphere. Water vapour can be produced from the evaporation or boiling of liquid water or from the sublimation of ice.

    HOW DOES  WATER VAPOUR AND EVAPORATION CONTRIBUTE TO CLIMATE CHANGE? 


    2 Images;


    science equipment

    Aim: To learn about  the expected behaviour in a science laboratory.


    Our R9 Class Treaty
    1.   Bags under your desk. 
    2. No food or drink   
    3. No running  
    4. Don't touch experiment 
    5.  Report any breakages
    6.   Do not taste or sniff anything 
    Safety in a laboratory.

    teacher   shoes   practical  teacher laboratory   ask  sniff teacher  breakages 
    1.   Follow the instructions given to you by the ____teacher______ .
    2.   You must not enter the laboratory without your ____teacher____.
    3.   Report all _____breakages_______ to your teacher.
    4.   You must never eat or drink in a ______laboratory______ .
    5.   ___shoes____ must be worn at all times.
    6.   If you spill something you should tell your _____teacher____ immediately.
    7.  You should wash your hands after every ____practical___ activity.
    8. You should know what you are doing. If in doubt ___ask___ your teacher.
    9. Never taste or ___sniff___ chemicals.
    In your group, discuss how the following scenarios could be dangerous.
    1. Not putting your bag under your desk.
    2. Running around in the laboratory.
    3. Not wearing shoes in a laboratory.
    4. Shaking a test tube with your thumb over its mouth?
    How do we work in this laboratory?


    1. Beginning and End of class: Lining up, Entry, Seating, 
    2. Equipment tray: equipment list and details.
    • Test tube - This is used  for experiments using liquids.They have a bung that can be placed in the top. Test tubes sit in a test tube rack.


      • Conical Flask - This is used for experiments with liquid up to 150 ml. The flask has a rubber bung for the top and the glass is heat proof.


        • Glass Stirring rod - This is a 20cm glass rod used to stir and mix any liquids together.


          • Test tube tongs - These are used to hold a hot test tube after an experiment.


            • Spatula - This is for holding very small amounts of chemical powders.


                      • Funnel - used to channel liquids into a smaller container.


                      • Measuring Cylinder - This is used to measure liquids for experiments. The liquids will be poured into a beaker or test tube once measured out.

                      Monday, September 23, 2019

                      Art hurumanu

                      hello so toady I'm gonna tell you about our arts hurumanu/stop motion.In our art stop motion we created a story that will show some kind of stop motion. Then we create our own characters for our story then we did the skrips for our story also.Me and my group and all of the students has our own story.Our story is about the homeless girl that she's our sister that we don't known.And we have a sheet of Narrative writing that were we wright different story's to pick one to put in our story and here are the link to mine and the link to my groups narrative writing.

                      This one is mine
                      https://docs.google.com/document/d/1FnIdpoRLwxFn6cKcWdJEvH02THg87FV18LAtXzJzCsU/edit
                      This one is Chloe's
                      https://docs.google.com/document/d/1VpUHiQqeZbXGJzCKsIUe3_EYwNQUKM4fFLOnKb_fBkY/edit?ts=5d7052ca

                      i didn't got the other narrative writing so i just put mine and Chloe's.
                      I'm gonna show you our background and our characters at the bottom.


                      this one is the background that we painted.


                      well actually i forgot the picture of our characters but i still have the background well that all of it hope you enjoy!!!


                      Friday, September 13, 2019

                      climate chaos

                      Climate Chaos
                      Written by: kristille ann

                      Title

                      Solar energy

                      Aim

                      To see what colour attracts the sun's heat.

                      Hypothesis 

                      I think that the colour is silver, white and black are the colour that will come out after we heat the cup

                      Materials

                      1. White Paper
                      2. White cup
                      3. Black plastic
                      4. Clear plastic cup
                      5. Black plastic cover
                      6. Tinfoil
                      7. Silver cup
                      8. 100mls water
                      9. Thermometer
                      10. Heat lamp
                      11. Timers

                      Steps

                      1. 1.Collect the equipment
                      2.  Set it up
                      3.  Plug in the heat lamp
                      4.  Pour the water
                      5.   Wait 15 minutes
                      6. Record your findings

                      Data/Findings

                      Conclusion

                      In conclusion my findings in this experiment sate that black attracts more heat. 

                      the water cycle experiment

                      THE WATER CYCLE EXPERIMENT

                      Bag 1: Normal Water cycle
                      Bag 2: Water cycle with CO2 added: like Oceans in climate change
                      Bag 3: Water cycle with ice added: like Antarctica in climate change

                      Material:

                      1.  zip bag
                      2.  water
                      3.  blue food colouring
                      4.   hot water
                      5. marker(any colour)
                      6. litmus paper

                      Steps:

                      1. first you need to get a zip bag to put the things that you need
                      2. then you need to put the water inside the zip bag
                      3. then you need to put a drop of a blue food colouring
                      4. then you need to zip it and it's the same with the second bag
                      5. in the second bag you need to put the water and the blue food colouring 
                      6. then you need to put the litmus paper at the side of the bag
                      7. then you need to put the baking soda inside of the bag
                      8. and closed it

                      Two Images:


                      Findings:


                      The Water Cycle: Bag 1
                      CO2 Water Cycle: Bag 2
                      Acid
                      Desert Water Cycle
                      Bag 3
                      Does it cycle?
                      22
                      Amount of Water
                      22
                      Acidity
                      11
                      The water cycle bag 1 had a small amount of water.
                      the water cycle from the 2 bag it had a small amount of water.


                      Key: Water and acidity amount: 1 = none 
                      2 = small 
                      3 = large 

                      Other comments:


                      Conclusion:

                      the normal water cycle..
                      in the normal water cycle in the 1 bag, it has a small amount of water in it and none amount of acidity on it.

                      the water with acid..
                      in the water with acid it had a small amount of water and a none amount of acidity on the 2 bag